
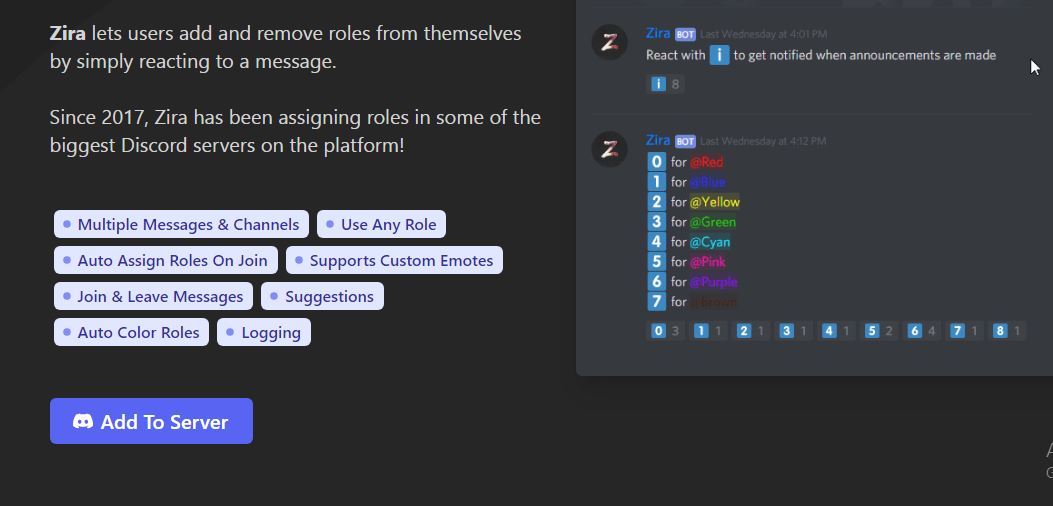
Discord comes with many helpful bots, but one that might catch your interest is the Zira Bot. Zira is a reaction bot, which is Discord lingo for a bot that helps you acquire or relinquish a role by clicking on specific reactions.
Discord roles make it easier to run a server. They do, however, take time to generate and assign, but reaction roles change that. Many server owners enjoy using Zira Bot, and you can too. Here’s a guide on how to utilize Zira Bot effectively on Discord.
How to Invite Zira Bot to Your Server
Zira Bot isn’t among the features that come with Discord, which means you have to sync the bot with your Server. Fortunately, inviting Zira Bot to your Server is a simple process. How do you do that? Simply follow these instructions:
- Sign in on Discord
- Visit Zira Bot’s official website.
- Find a blue button named Add To Server and click it.
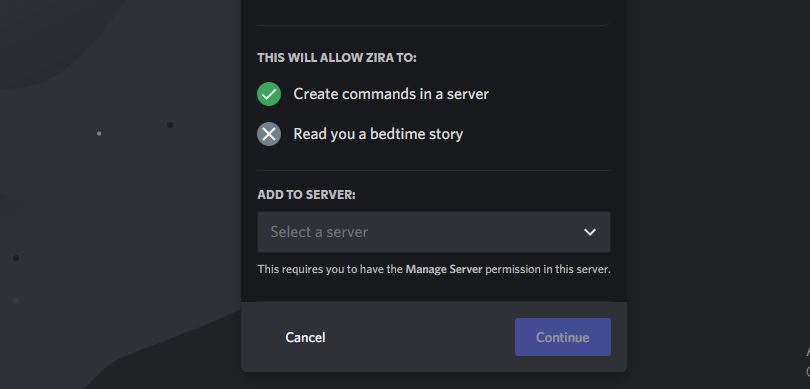
- This redirects you to a Discord page with a prompt asking you to select the Server you want to add the Zira bot to.
- Select the Server (s) and click Continue.
- Choose the permissions you want to give Zira Bot on the selected Server (s) and click Authorize.
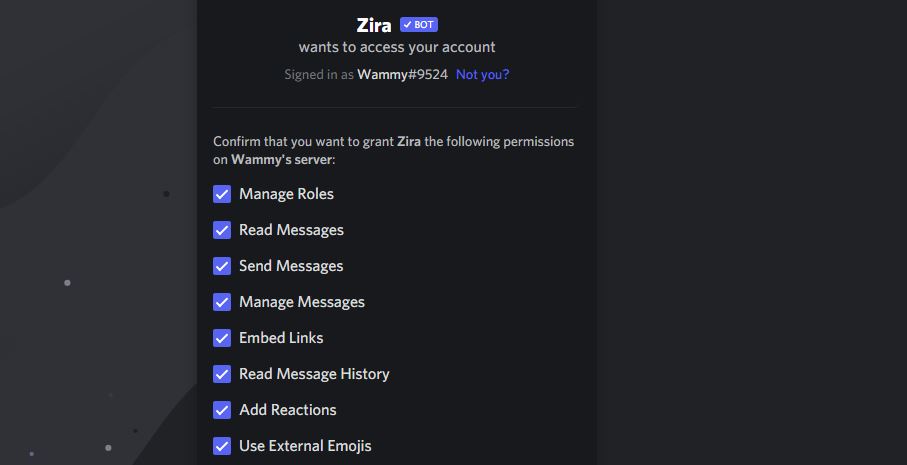
Giving Zira Bot Administrator permission will automatically allow the bot to have complete access to your Server. If you want to avoid this, make sure you untick the administrator permission before authorizing.
The Most Useful Zira Bot Commands
In total, Zira has over 20 commands split into four broad categories. Here’s a simplified breakdown of the most useful commands in each category.
Role Commands
| z/Normal | Sets normal roles to a selected active message. |
| z/Once | Adds a one-time reaction role to a selected active message. |
| z/List | Shows all current reaction roles in your server. |
| z/Voice | Automatically gives users roles based on their voice channel attendance. |
| z/Autorole | Automatically assign roles to users and bots when they join, without them having to react. |
| z/Delete | Deletes reaction roles from a message. |
| z/Delete all | Deletes all reaction roles from a single message. |
| z/Remove | Adds a reaction role that removes a user’s role and sends it to a currently selected active message. |
| z/Toggle | Adds a toggle role to the currently selected active message. |
Logging Commands
| z/Log | Lets server owners set logging channels for reaction roles. |
| z/Join | Permits Zira Bot to send invite messages to the channel it’s linked to. |
| z/Leave | Allows Zira to send leave messages to a specified channel. |
Suggestion Commands
| z/Suggest | Permits users to submit suggestions. |
| z/Approve | Approves suggestions and, if they are configured, moves them to the approved suggestion channel. |
| z/Deny | Denies suggestions and moves them to the denied suggestion channel if configured. |
| z/Invalid | Marks suggestions as invalid or spam, and if configured, moves them to the invalid suggestion channel. |
Miscellaneous Commands
| z/Rooms | Lets users create private voice channels |
| z/Colors | Creates eight-color roles in your guild. |
| z/Config | Gives users miscellaneous configuration commands. |
On Discord, Zira Bot commands are executed using the prefix z/ before the command. For instance, to delete reactions from a message, you will write: z/delete.
Zirabot Not Working Problems & Fixes
Like all types of technology, your Zira Bot might run into technical problems every once in a while. You might notice it fails to respond to commands or goes offline without an explanation. Should you encounter these or any other technical concerns, here’s a list of troubleshooting suggestions that can come in handy.
- The bot isn’t responding to any commands – You may experience this because you haven’t given Zira the required permissions. For the bot to read and respond to messages accordingly, you need to give it Read Messages, Send Messages, Embed Links, Use External Emojis, and Read Message History permissions. So, ensure these are all set up.
- You can’t use a particular emoji despite the channel having all the required permissions – Zira must exist on the Server where the emoji came from and the one it’s being sent to.
- Zira isn’t adding reactions to messages – This often happens when you forget to set either the message, channel or both where the bot will send reactions. Correct this by using the channel and message commands to set the message reaction to the corresponding channel.
- Zira Bot is adding reactions but not assigning any roles – The bot may react to messages but still fail to assign roles if you haven’t given it the Manage Roles permission. This may also be the case because the role Zira is trying to assign is higher than the bot’s highest role.
- You keep getting the “Please set a channel and message first, then try this command again” error message – This error message also shows you haven’t set any channel or message. Resolve it by setting both up using message and channel commands
- Zira Bot can’t remove reactions – The only way Zira removes reactions is if you have given it the Manage Messages permission. Also, the reaction must appear on an active message that hasn’t been assigned a role or whose corresponding role is either Once, Toggle, or Remove. You can, however, manually clean up unremovable reactions.
If Zira Bot fails to respond after applying the above steps, make sure you did not change the bot’s default prefix.
How to Use Reaction Roles on Zira Bot
Setting up Zira Bot’s reaction roles is easy once you’ve invited it to your Server, and you can use this step-by-step guide to make sure you don’t miss a thing.
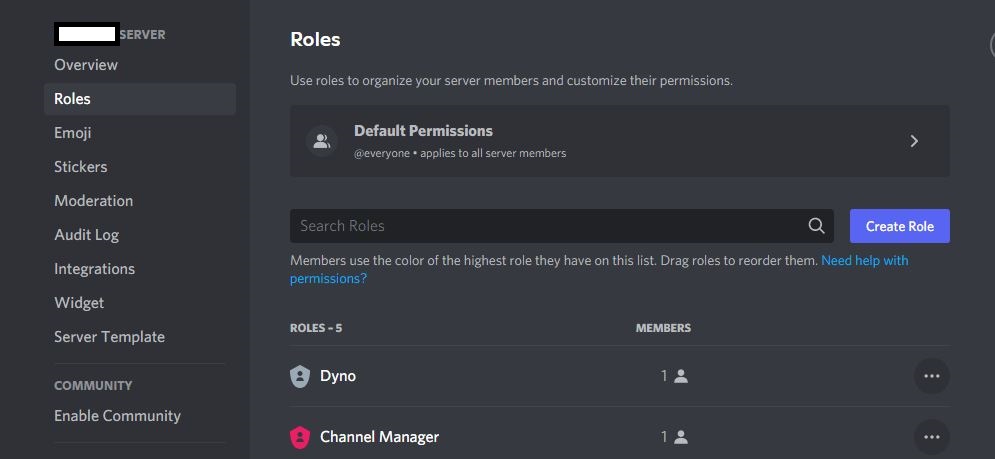
- Open your Server and click the drop-down arrow to find your Server Settings.
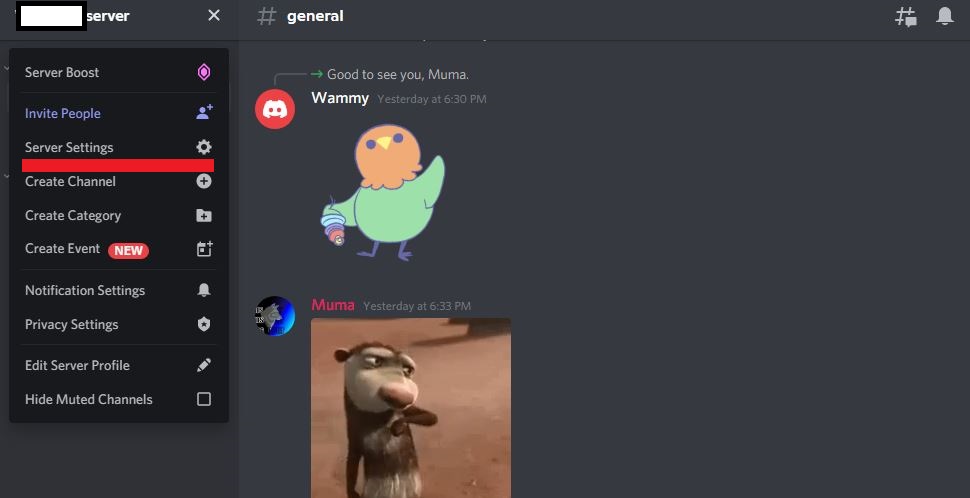
- Click on Server Settings and Select Roles.
- Click on the blue Create Role button.
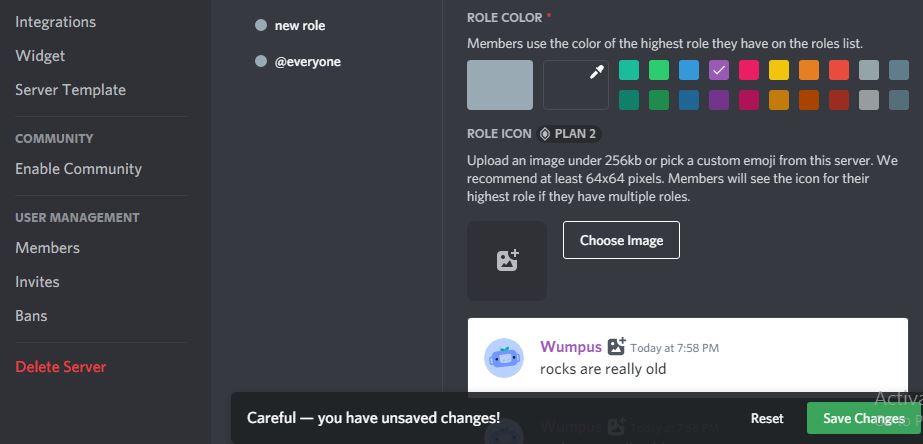
- Customize your Role Names and Role colors, save changes, and return them to your Server.
The reason for going back to your Server before assigning emojis to the role you just created is because you need to have a new text channel where you’ll place all the assigned roles and their corresponding emojis. Here’s how to go about creating this text channel.
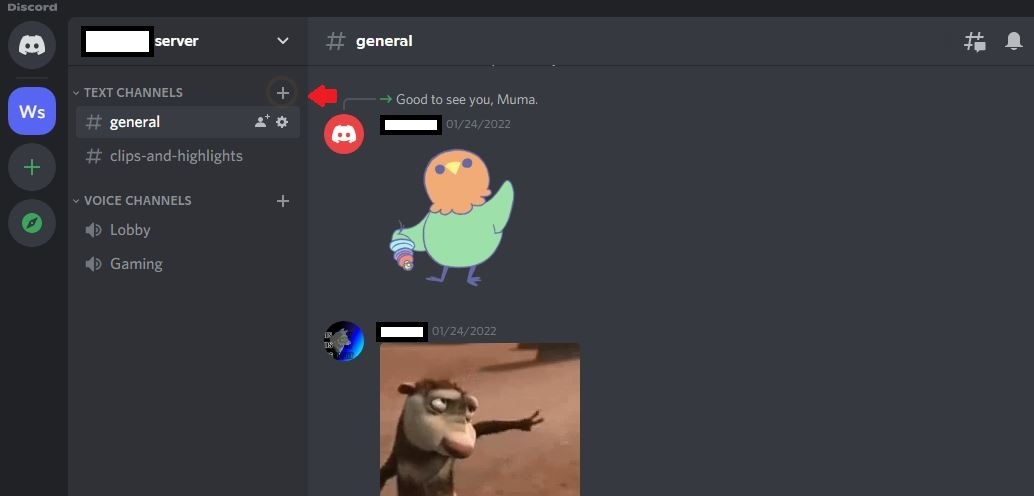
- On the left panel, click the Plus Icon next to Text Channels.
- Name the channel Assigned Roles and select Text Channel.
- Click the Create Channel button.

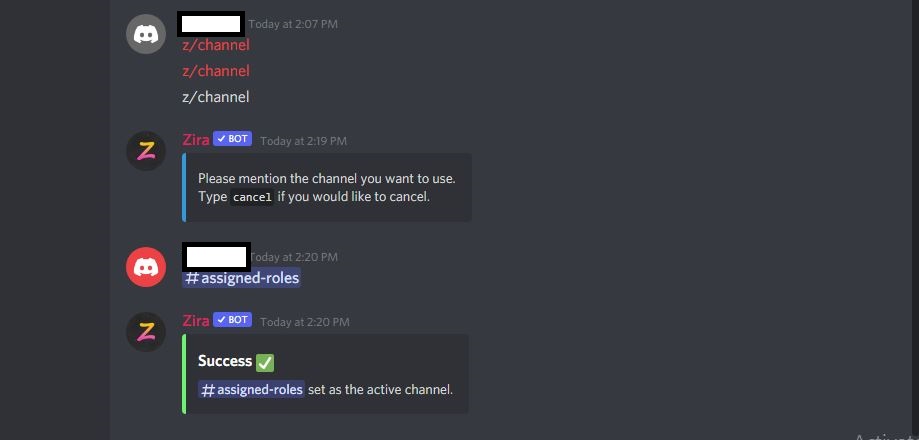
- When your new channel opens, type z/channel, and press Enter.
- You will receive a prompt to mention the channel’s name. Write Assigned Roles and click Enter. This will now be the channel used to assign roles.
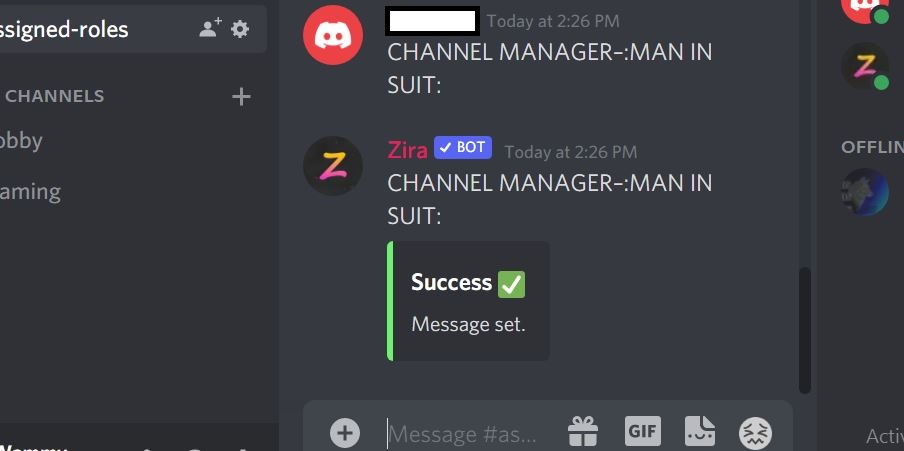
- Type z/message in the Assigned Roles channel and click Enter to assign emojis.

- Zira will ask you for a message ID, which is given in the format ROLE NAME –:EMOJI NAME:
- You need to add the assigned emojis to their respective roles, so go back to your Assigned Roles channel.
- Type the command z/add: EMOJI NAME: @ROLE NAME and click Enter.
Going forth, any member on your Server who reacts with this emoji will have the role it comes with. To see which member has a particular role, click on their name on the Members Panel.
How to Remove Zira Bot From Discord
There is only one way to remove Zira Bot from your Discord Server, and these steps will help set you up.
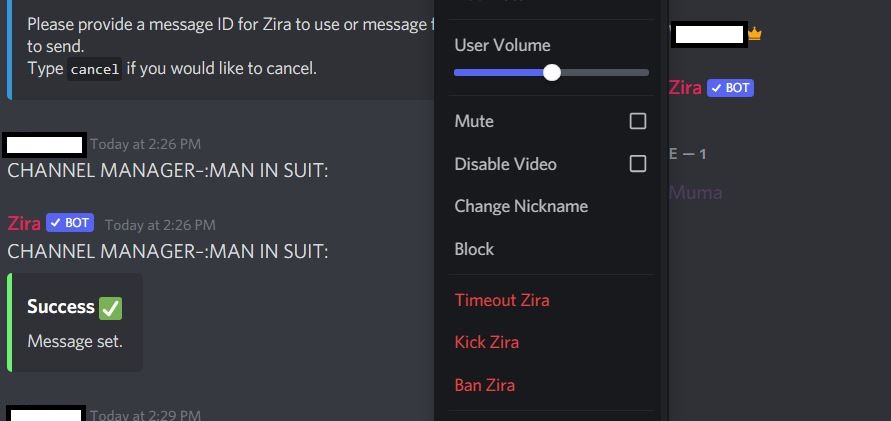
- Right-click the Zira Bot icon.
- Click on Kick Zira to remove the bot from your Server.
- You can also click on Ban Zira if you want to permanently remove the bot and prevent anyone else from adding the bot again.
Where Can I Find the Message and Channel IDs?
The first step to obtaining a message or channel ID is to turn on Developer Mode. For Android users, the steps that follow will help you turn on Developer Mode
- Go to User Settings.
- Click on App Settings.
- Select Behavior and turn on Developer Mode.
iOS users, on the other hand, can use these easy steps to find and switch on Developer Mode.
- Go to User Settings.
- Click on Appearance.
- Select Advanced and turn on Developer Mode.
After enabling Developer Mode, Android and iOS users can get message IDs by clicking the three dots at the top right of a message and selecting Copy ID from the drop-down menu. Obtaining the channel ID, on the other hand, you need to long-press the channel name and click Copy ID.
On the Desktop app, you will find it easier to turn on Developer Mode if you carry out each step below.
- Go to User Settings.
- Click on Advanced and turn on Developer mode.

On the desktop app, the process is more simplified. All you need to do is click the three dots to the right of the message and select Copy Link. This link contains the message, user, and channel IDs.
Will Using the Delete Command Affect Current User Roles or Reactions?
Using the delete command will not affect a current user’s role. It also won’t change or delete their current reactions.
Wrapping Up
If you want to make things more fun and engaging on your Discord server, setting up reaction roles could be just what you need. Not only will server members get to choose their roles, but it will also keep things neat. Be it a simple emoji or GIF; reaction roles will increase interaction and save you time by automating tasks. So, give them a try and let us know your experience in the comments section.
Read More on Get on Stream


