
Apex Legends has suddenly become the go to Battle Royale game. Warzone has started to die out and Fortnite got a quick burst with it’s no build mode but the real action is happening in Apex.
If you have found that you are particularly good at Apex Legends, you might want to start streaming it on Twitch or Youtube. In this guide we are going to show you how to stream Apex legends on Twitch or Youtube using Streamlabs.
Install Streamlabs
We are going to be using the Free Streamlabs software to stream to the streaming platform of your choice. You can download and instal Streamlabs here.
Once you have installed the software you can follow along with the steps below.
Creating a Scene
The first thing you need to do is create a scene for the Apex Legends stream. Scenes are a great way to organize your streaming displays. You can also easily switch up scenes during your stream.
You will need at least one scene for streaming Apex Legends so let’s get to creating one.
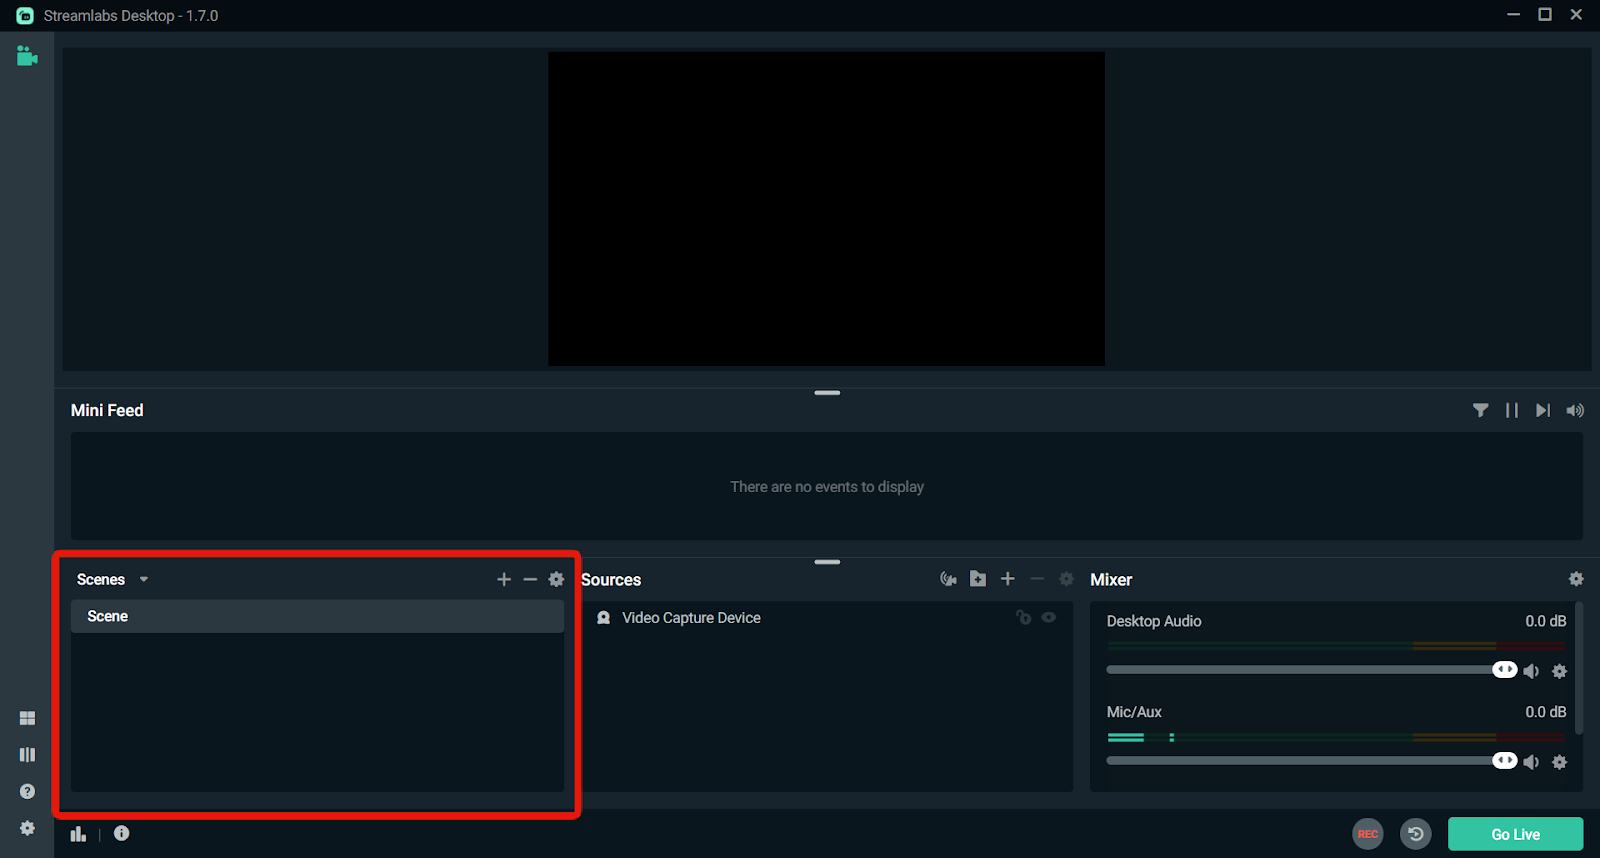
- Open your Streamlabs desktop application on your computer. Once your Streamlabs application is open, you will see the main Streamlabs Desktop page.
- Go to the Scenes window at the lower-left side of your Streamlabs application, then click on the + icon at the upper-left side of the window.
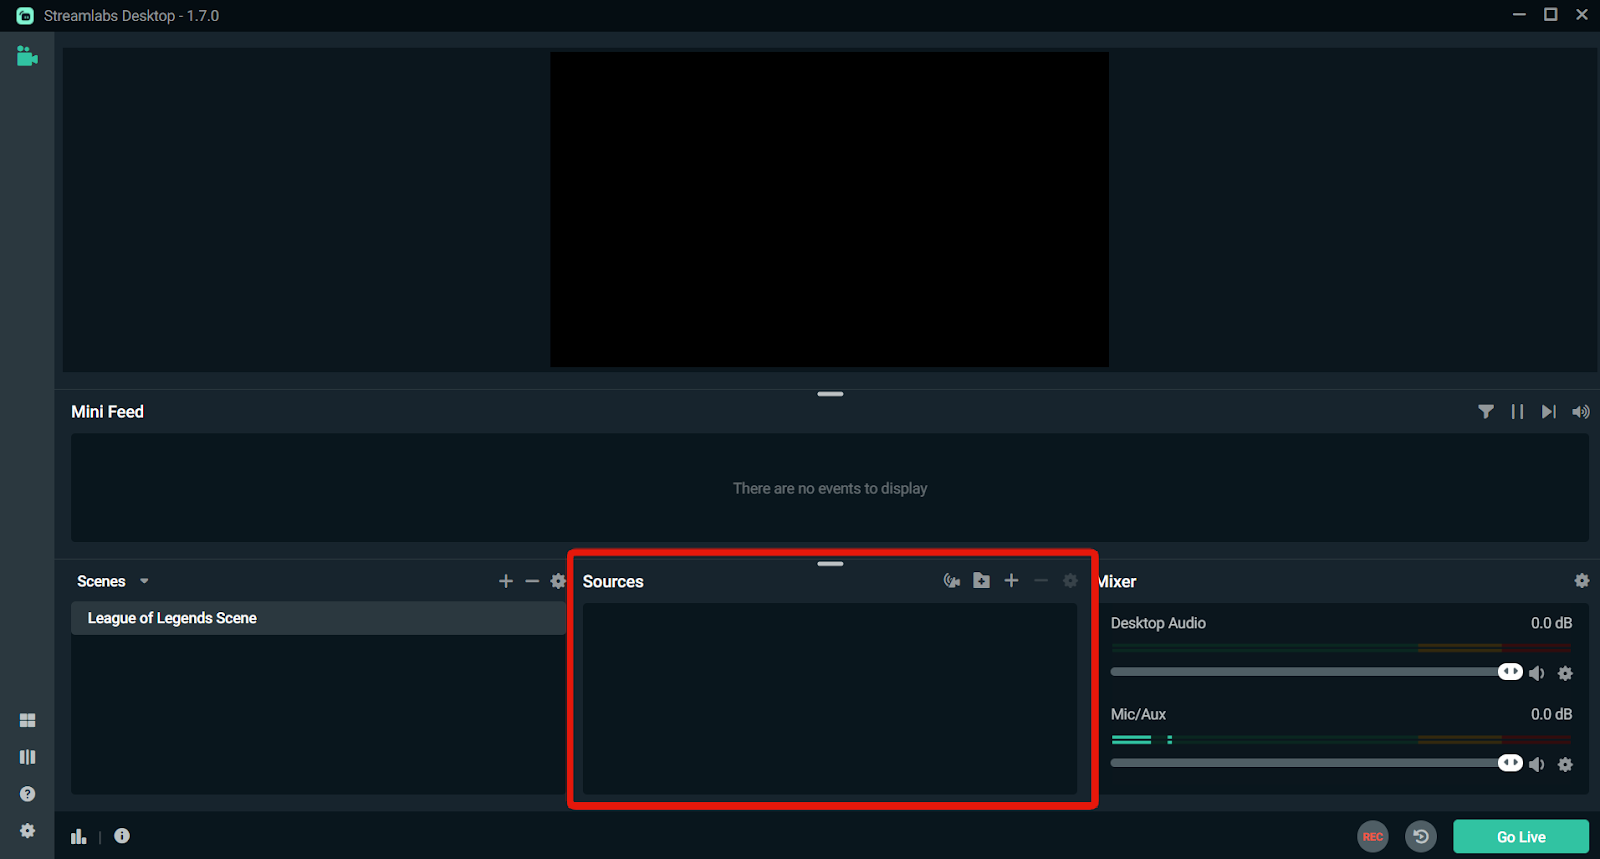
- Enter the name of your Apex Legends scene. Feel free to type in any name, preferably one that implies its functionality and is easy to identify later on. Once finished, click Done.

Adding Apex Legends Through Game Capture
Once you have a scene (display layout) ready, you will need to add everything you want to stream while playing Apex Legends. These include the actual game you will be playing and any additional sources you may need such as a webcam, a stream overlay, or an external microphone.
Here’s how to add the Apex Legends game through game capture.
- Go to the Sources window in the lower-middle part of your Streamlabs application, and click on the + icon at the upper-left side of the window.
- In the General Sources section, select Game Capture and click Add Source.
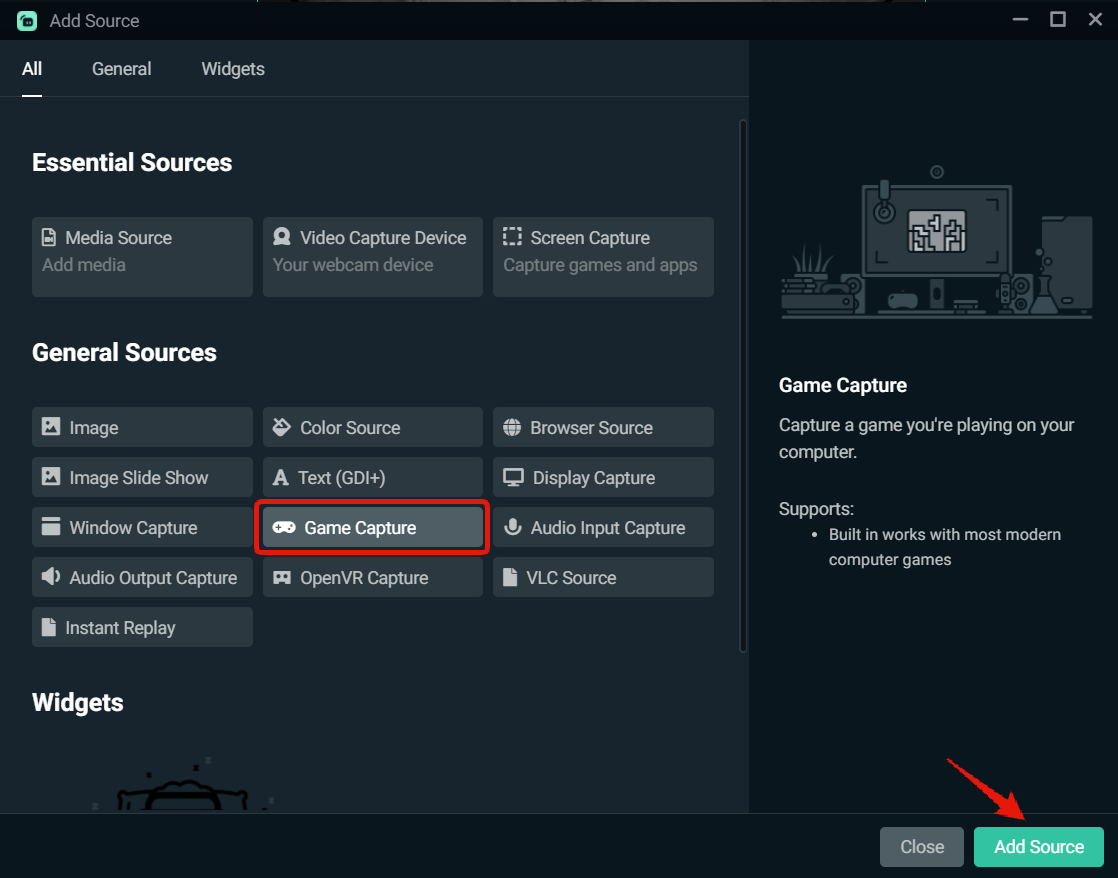
- Then, rename the source of the game capture with a name that is easy to identify later on and click Add Source. Once done, you will see a Settings for Game Capture window on your screen.

- To set the Apex Legends game capture, click on the drop-down menu next to Mode. Make sure that your Apex Legends is open. You can select one out of three options.

- Once you’re done, click Close. You should now see the Apex Legends game capture added at the top of your Streamlabs application.

With this setup, you can choose to start your live game which should now stream seamlessly on Streamlabs. Optionally, you can proceed to customize your display however you see fit. Some customization options include adding a webcam, an overlay, a microphone, or moving and resizing your Streamlabs display scenes. All these options are up to you.
How To Add A Webcam To Streamlabs For Apex Legends
Now that the game is up and running it’s time to add your webcam. Here’s how to add a webcam:
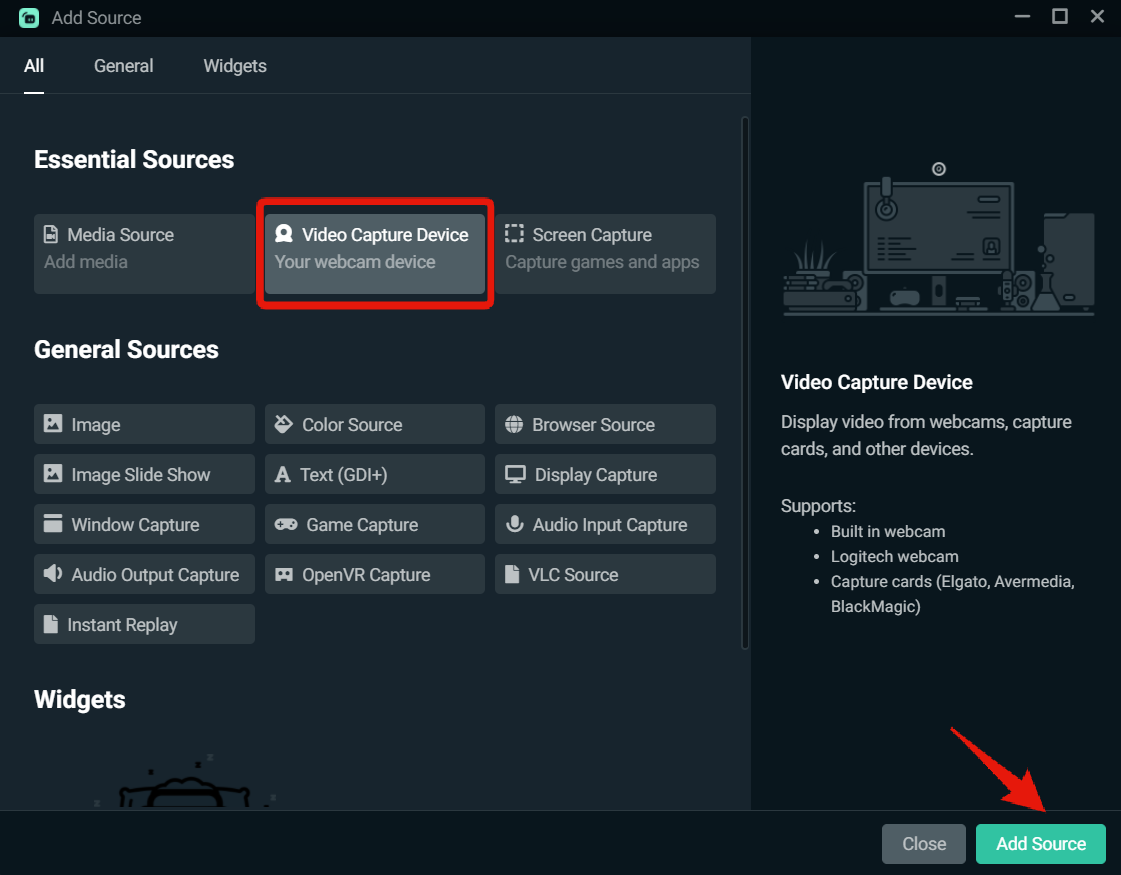
- Go back to the Sources window and click on the + icon at the upper-left side. Then, select Video Capture Device and click Add Source.
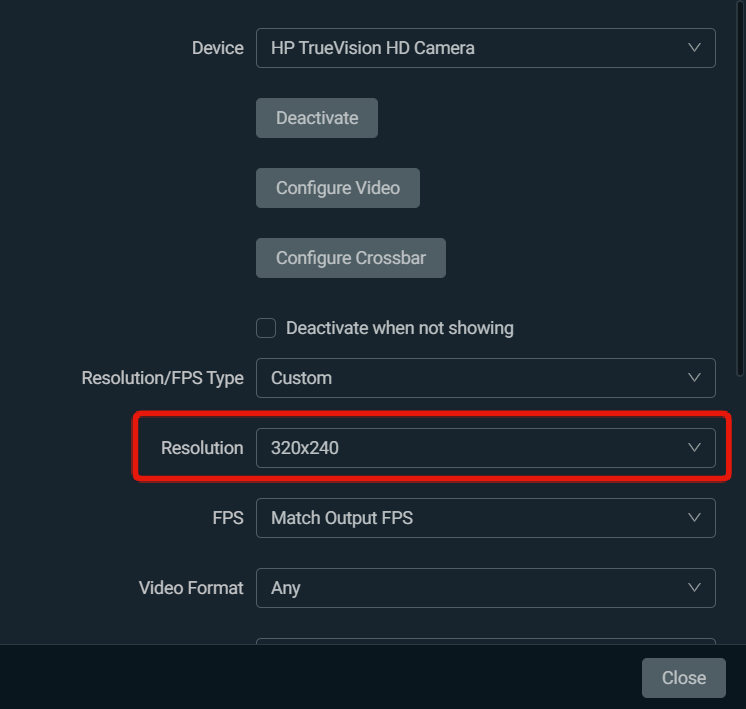
- You can adjust the webcam settings as you see fit. I recommend using your default camera resolution and then scaling it down to fit in your scene.
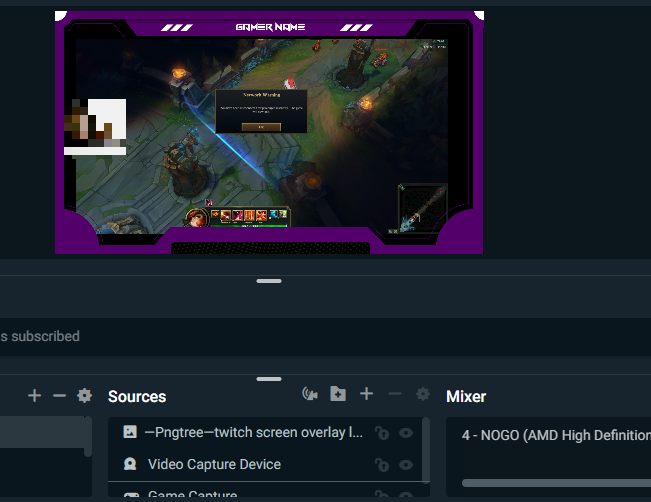
- You should now see your webcam view placed on top of your Apex Legends client display. Feel free to resize or move the webcam image as you see fit.
How To Add An Overlay To Streamlabs
Adding an overlay to your stream on Streamlabs is a great way to add some extra flair and personality! Overlays will help you keep track of recent events while streaming like, updates on new subscribers, viewers chats and donations from your viewers. There are a few different ways to do this, but I’ll show you the easiest way.
First, you need to download an overlay from an external source. A good simple overlay should be in PNG form.

Once you have downloaded your PNG overlay, drag and drop it at the Sources window on Streamlab and adjust the overlay to fit to your liking.
And there you have it. With this simple overlay your stream has a much higher production value. If you would like to check out more ways to add more complicated overlays on Streamlabs, check this article.
How To Add A Microphone To Streamlabs
Now everything is set. All you need to do is add an input audio source and start streaming.
If you have an external microphone, here’s how to add it to your Streamlabs.
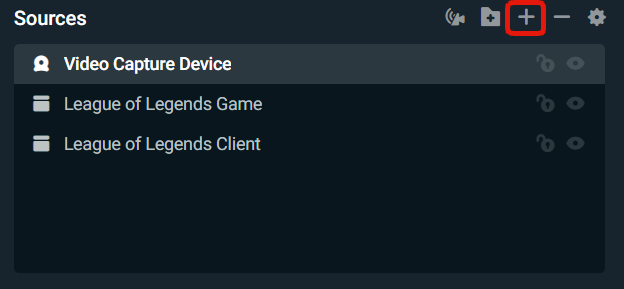
- On your Streamlabs application, go to Sources and click on the + icon at the upper-right side of the window.
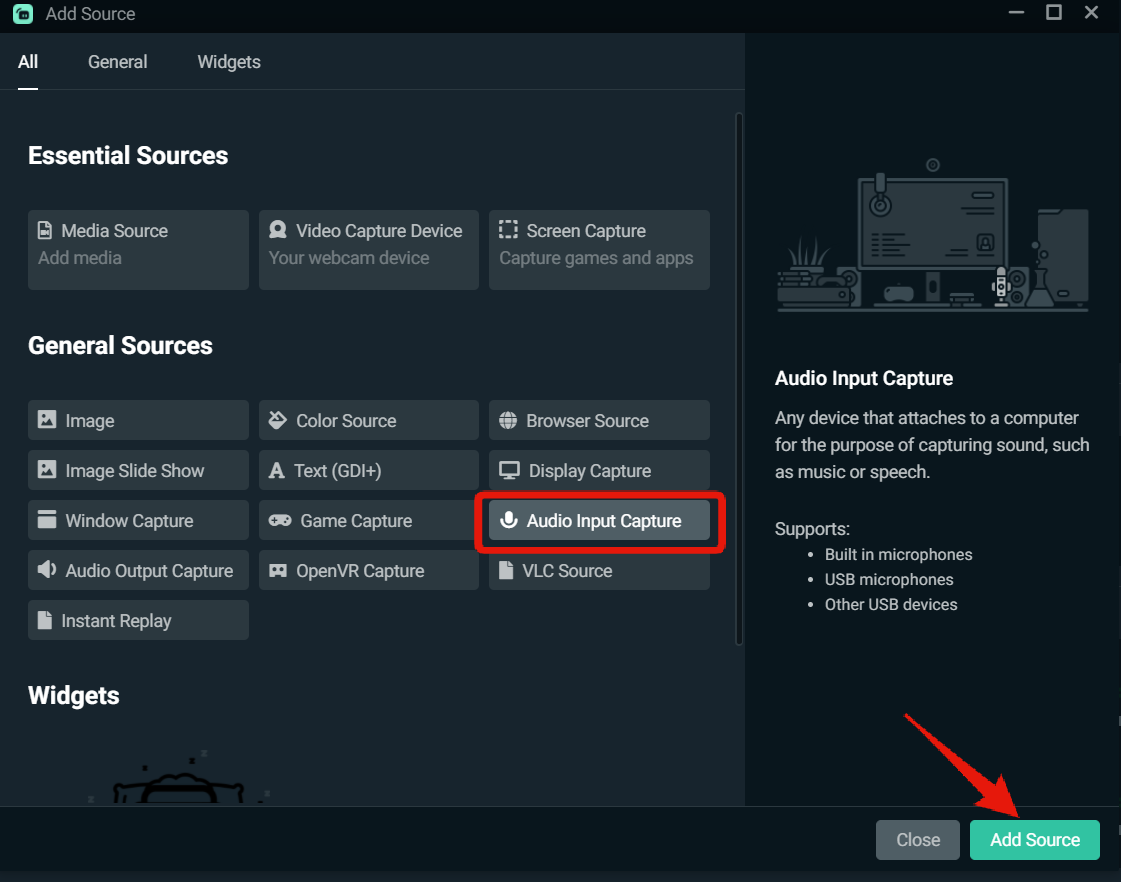
- Then, select Audio Input Capture and click on Add Source.
- Since this is a new source make sure to toggle the Add a new source instead button and type in the audio or microphone name you prefer to use. Once done, click Add Source.
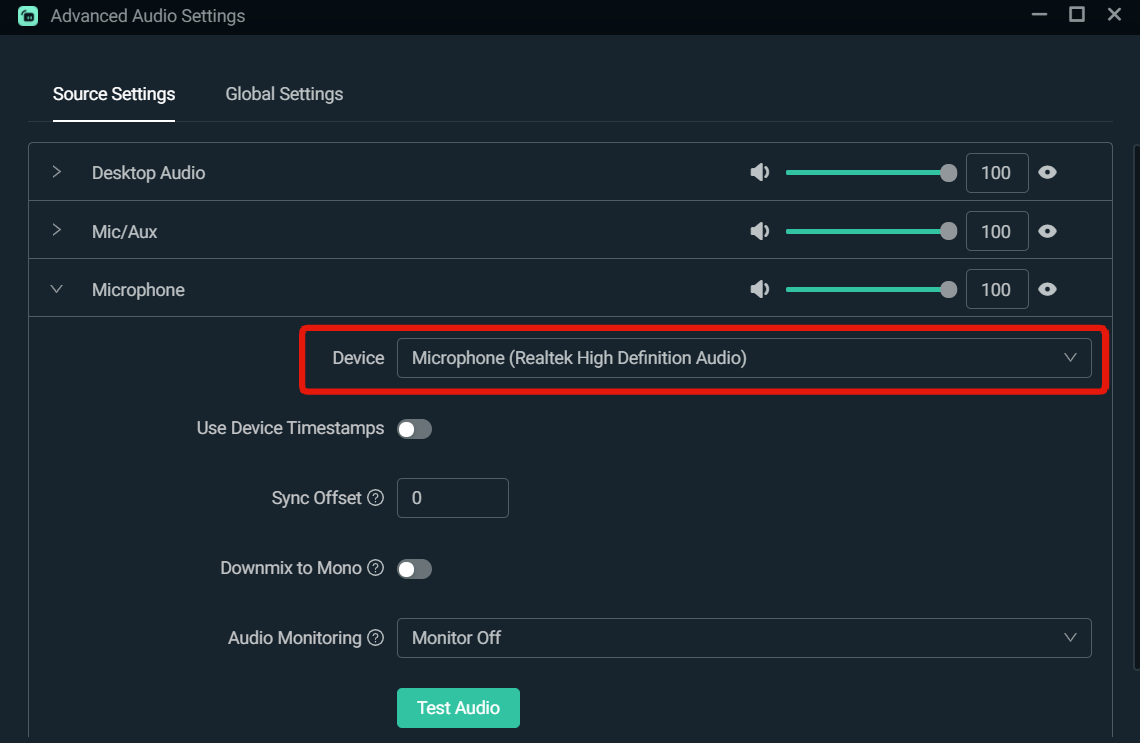
- Lastly, select the microphone you would like to use for streaming, and close the Advanced Audio Settings window. You should now see your microphone added on the Mixer window at the bottom-right side of your screen.
How to Fix Streamlabs Black Screen While Streaming Apex Legends?
Black screens are when viewers cannot see your game. The name is acquired from a giant black box that appears in place of where your streaming display should be.
There are many reasons that can cause this, and in the next section, we will look at some of the most common reasons and quick fixes for black screens on Streamlabs.
Activate the Eyeball on Your Sources
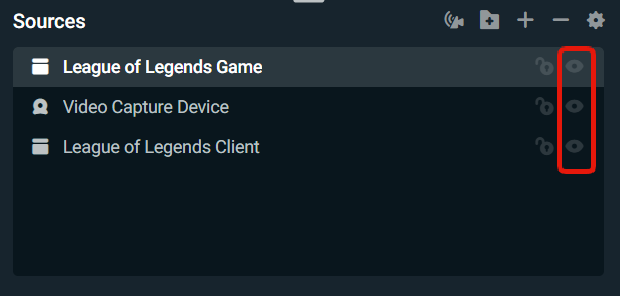
The easiest quick fix to this issue is confirming that the eyeball icon is activated on your display sources. This can be found in the Sources window of your Streamlabs application, towards the right side of all your individual Sources. Make sure that each of the sources you want displayed on your stream has its eyeball icon activated.
If this does not work, you can try out the next more technical fixes.
Run Streamlabs as Administrator
Before anything else, make sure that you open your Streamlabs application as an administrator. This setting will make sure that you have the top-most privileges and access rights to your computer settings. Here’s how to do this.
- First, navigate to where your Streamlabs application is on your computer. Then, right-click on the Streamlabs application and select Properties. At the top of the Properties window, select the Compatibility tab and scroll down to Settings.
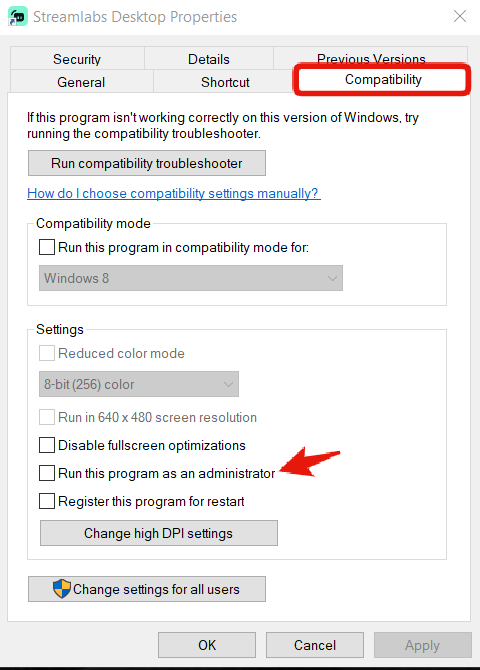
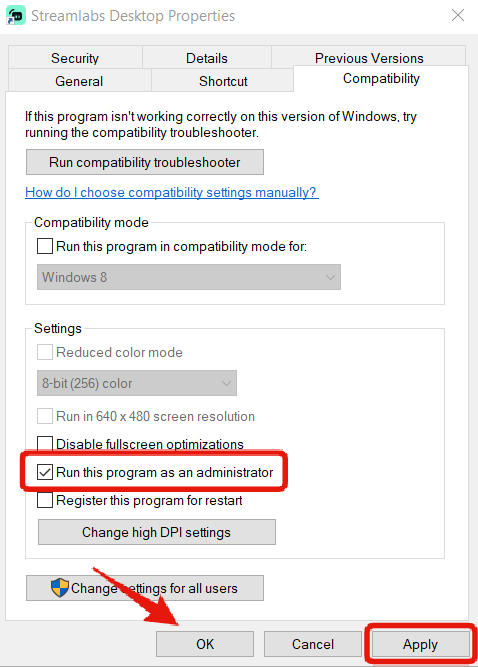
- Make sure to check the checkbox that says Run this program as an administrator. Once done, click Apply, then click OK.
- Once finished, restart your Streamlabs application.
Uncheck Force GPU as render device
Another issue could be a GPU setting that is interfering with displaying your sources. To make sure this issue is ruled out:
- Open your Streamlabs application and navigate to the settings icon on the bottom-left of your screen
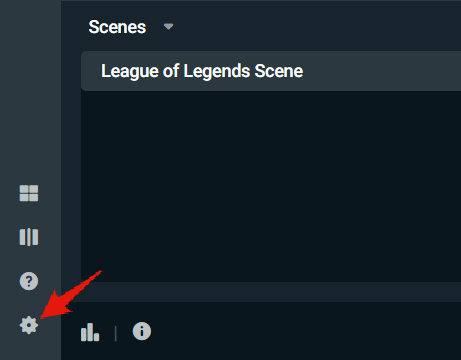
- You will see a Settings window appear on your screen. Now, go to the left-side menu and click on Advanced. Then, scroll to the Video Section and uncheck the checkbox that says Force GPU as render device.

- Keep scrolling down and click Done.
- Once finished, restart your Streamlabs application.
Wrap Up
So there you go, that is everything you need to know about how to stream Apex Legends on Streamlabs. Enjoy streaming Apex Legends and growing an audience on Twitch or Youtube. If you don’t know what platform to stream on check out Twitch vs Youtube.
Read More From Get On Stream:


