
Through Twitch, we get the tools to interact with our audience in many exciting ways. At first, we give them a little entertainment with gameplay elements as we try to complete/compete in video games. Similarly, we have the option to give/get feedback when we talk with our chat.
When we create a fun environment, we lead the way for possible contributions. Sometimes, instead of a couple of “follows,” our audience is driven to “subscribe” to the Twitch channel. Plus, with the aid of donations, they have the opportunity to share their thoughts with personalized messages.
Following the trend, Streamlabs gives us more ways to earn donations in unique ways. For example, through a single payment, they can share Youtube links that play in the middle of the Stream.
At the same time, they find it rewarding when they get our live reactions and the audience’s responses through your chatroom.
In this article, you’ll learn How To Setup Media Share In Streamlabs OBS and have it ready the next time you plan to Stream.
How To Setup Media Share In Streamlabs OBS
To begin with this process, you’ll need to create a Twitch account first. Secondly, you could link this account with Streamlabs to have all the additional content for your channel (like Media Share). When you have everything prepared, you’ll need to follow these steps on the Streamlabs website.
First, You’ll Need To Enable Media Sharing:
- Step 1: Log into the dashboard (The first site you’ll see when you log into your account).
- Step 2: Navigate to the left side of the dashboard, click on “All Widgets,” and wait for the page to load.

- Step 3: Through the different “squares,” look for the one named Media Share and Click on it.

- Step 4: If everything is going according to plan, You’ll see the different Media Share settings that Streamlabs gives you. Now, look in the top-right corner of the website and click on “Enable.”

- Step 5: A Pop-up window will appear in front of you, giving you two options. You can either Click between “Auto-Show Videos” or “Auto-Hide Videos.”

Remember that not all visitors on Twitch will visit your channel and play by the “rules.” Sometimes, they could even harm your reputation or ban your channel if they add Youtube videos with explicit material.
As a result, Streamlabs gives you the option between “Auto-Show Videos” or “Auto-Hide Videos.” If you click on the first option, you’ll need moderators to see the upcoming links and greenlight any upcoming video. Indeed, if you’re starting your Twitch journey, you could click on “Auto-Hide Videos.” With this option, you can review the links before playing them live on your channel.
Second, You’ll need to Add Media Share to Streamlabs OBS:
- Step 1: Go into your Desktop, click on Streamlabs OBSand wait for it to load.
- Step 2: In the main menu, click on the Scene you want to modify.
- Step 3: Add a new Source by clicking the + sign.

- Step 4: On the Widget Menu, look for the Media Share button and click on it. Additionally, you can customize it by giving it a proper name.

- Step 5: In the Media Share menu, you’ll find more ways to adjust any settings. For example, you can increase/decrease the “Price Per Second” for each video. When you’re ready, you can add the new widget to your channel.
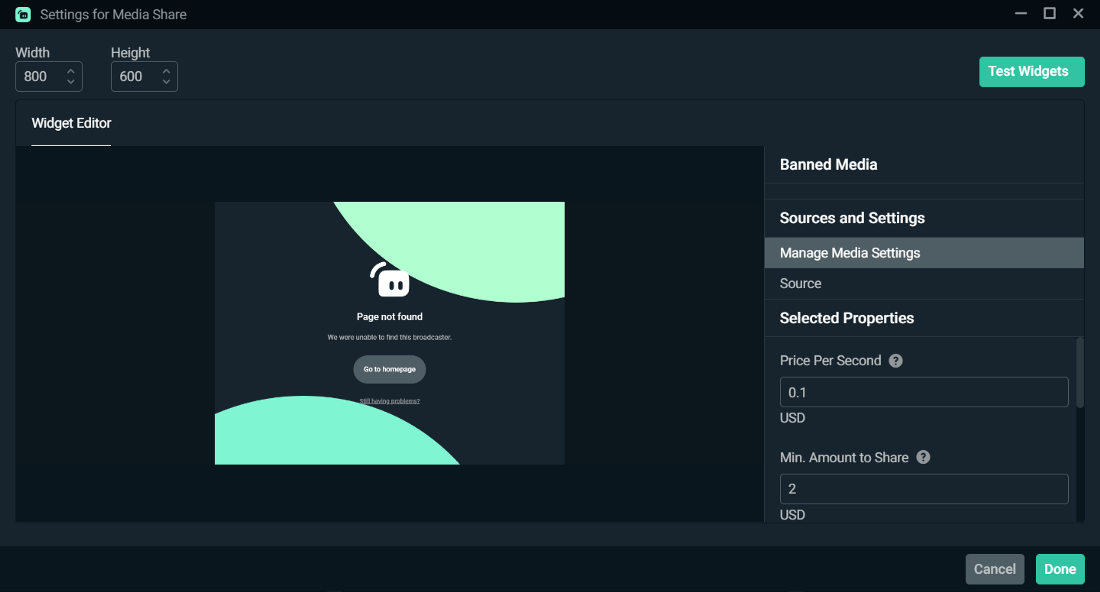
- Step 6: Click “Done,” and the media share widget will be ready on your future Streams.
How Do My Viewers Use Media Share On Streamlabs?
And that’s it! Your viewers will now have the option to share a video on your stream when they try to make some donations. The length of the video depends on the media itself or how much they donate to your channel.
Below you can see the donation page where they can paste their link to the video they want to share.

Wrapping Up
When you have Media Share in your channel, you can develop fun ways to use it while streaming. For example, you could ask your audience to look for guides when you get stuck in a video game. Remember to review every piece of content before it goes live.


