
When looking at the videos of a streamer, you will see that most of them add background music as it builds up the ambience and improves the production quality. Plus, your stream will look interesting, which will attract more viewers.
Today, we will be looking at how you can add music to your live streams in Streamlabs. This guide will also help you play any music from your Spotify or Apple Music playlist. We will also teach you how you can add music to a specific scene when streaming.
Playing some songs might get you a copyright strike. So, it is important to use royalty-free music. That is why we have also added a few sources from where you can get royalty-free music.
How to Play a Music File in Streamlabs OBS
The process of playing music files in Streamlabs OBS is pretty easy. If you have the music files on your PC, follow the steps given below.
Step 1: Open Streamlabs OBS.
Step 2: Click on the ‘+’ icon next to the Sources section (Add new source). A menu will open up. Click on Media Source.

Given below is a list of the music file types supported by Streamlabs OBS.

Step 3: Click on Add Source.

Step 4: On the next window, click on Add a new source instead.

A text box will appear. Here, you can name the source. Give it any name you want. Then, click on Add Source.

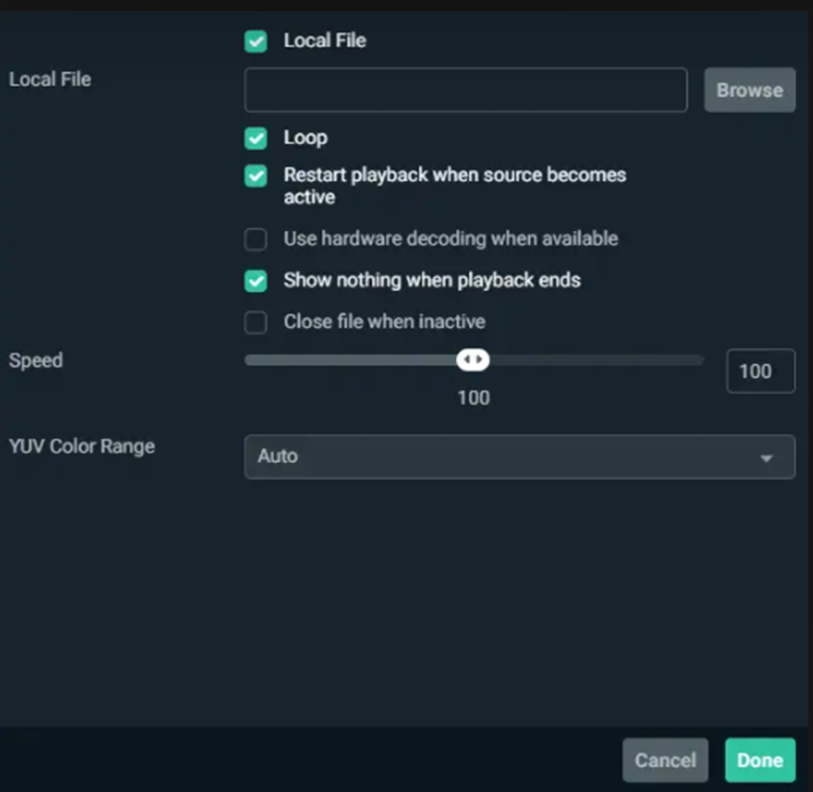
Step 5: This will open up a new window. Click on the Local File check box. Then, select the music file that you want to play from your PC by clicking on Browse.

There are some other options like playback speed and loops available as well on this window. Adjust them according to your liking.
You may also be interested in The Best Royalty free Music For Twitch.
How to Add a Playlist From Spotify or Apple Music on Streamlabs/OBS
The process mentioned above is good when you have downloaded all the songs and music on your PC. However, if you have your favorite songs saved on music streaming services like Spotify or Apple Music, follow the steps below.
Step 1: Open Streamlabs OBS. Also, open Apple Music or Spotify or any software from where you want to play songs and keep it minimized for now. In OBS, click on the ‘+’ sign next to the Sources section.
Step 2: Click on Window Capture on the next screen that opens up.
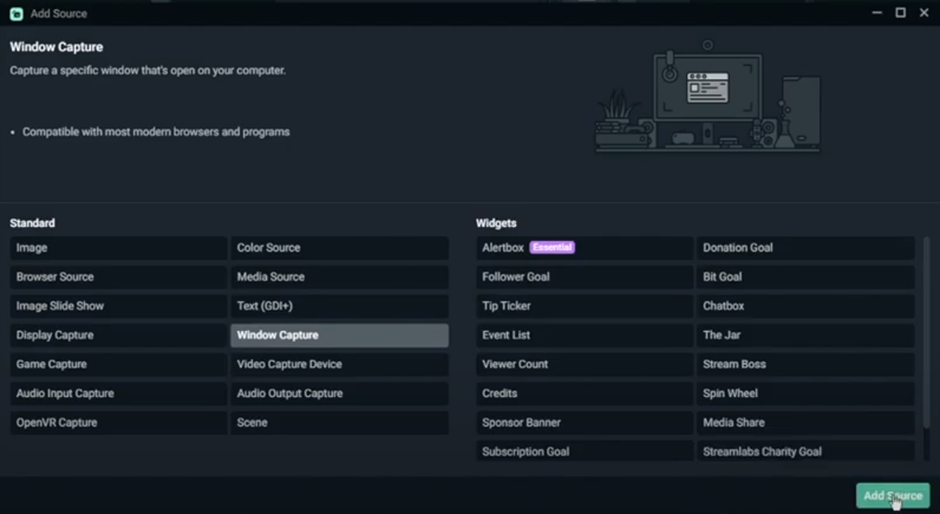
Click on Add Source.
Step 3: On the next window, click on Add a new source instead and ensure that the button is marked green.
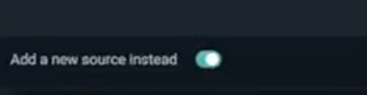
In the following window, write the name of the source according to your liking. Once again, click on Add Source.
Step 4: In the next window, you will select the program from where you want to play your music.
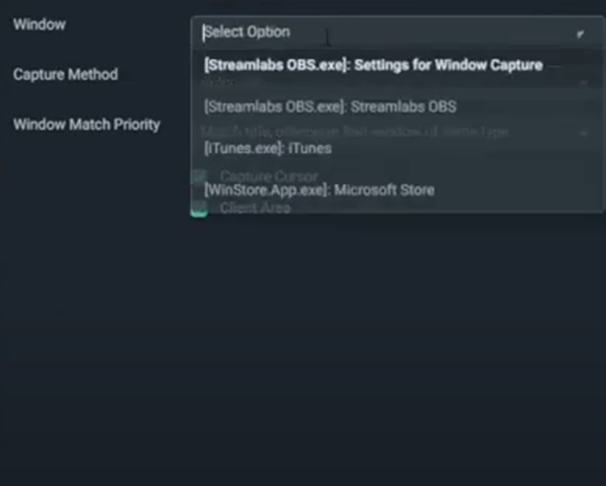
Open the drop-down menu of the Window section. From here, select the music software (Spotify or Apple Music) from where you will be playing the music.
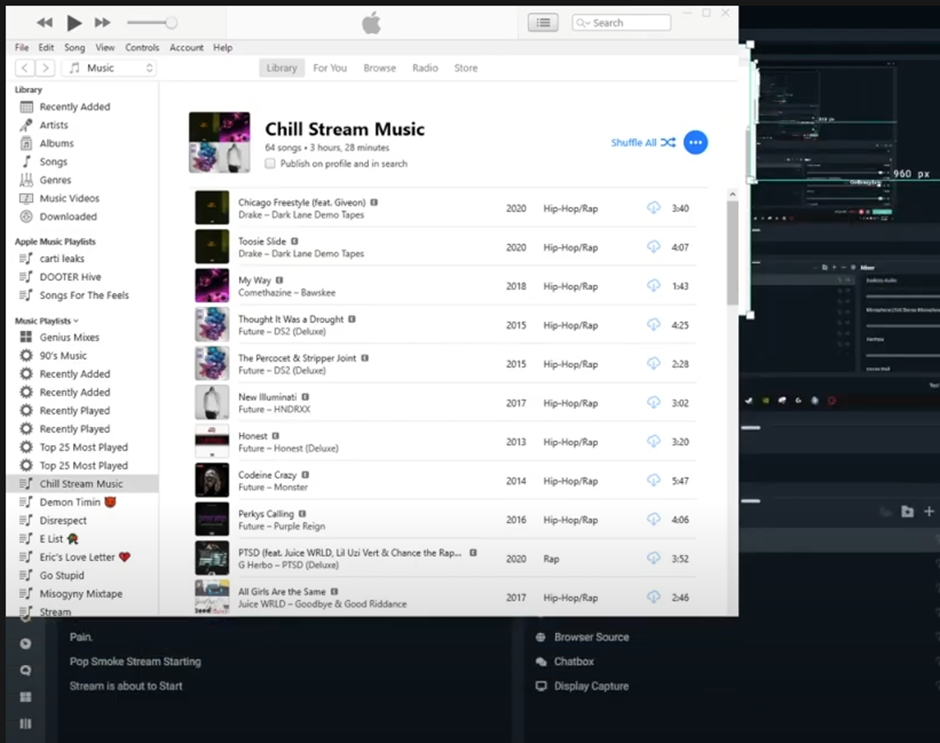
Step 5: Whenever you select software from Windows Capture, the window of the program will be visible as an overlay on the screen. Now surely you don’t want your viewers to see half of the screen hidden by Apple Music or Spotify. Luckily, you can select how much of the screen will be visible on the stream.
Once you select Spotify or Apple Music, you will see a preview of the screen open up on your screen like this.
By holding the Alt key, you will be able to crop the top and the sides of the window. The process is just like resizing a window, but here you are eliminating unwanted sections of the window. You can even drag it to any place you want.
After cropping the window of Apple Music, here is an example of how the cropped version might look like.

And that’s it. Whenever you want to play a piece of music, all you need to do is to go to Apple Music or Spotify and start playing the music when streaming.
All of these songs will be played under desktop audio.

Just a quick tip, you can keep the playback controls and the name of the music file on top of your screen. This will allow you to play or pause the music quickly, and your viewers will be able to see which song you are playing.
How to Add Music to A Specific Scene in Streamlabs OBS
If you select a music source directly from OBS, it will play throughout the entire stream. However, a stream has different sections – the “Starting Soon” section, the “Interval Section,” etc. Adding different music to each scene according to the mood will really boost the quality of your stream.
Step 1: First, you need to decide which scenes are going to be present on your stream. Based on that, you need to create these specific scenes.
Go to the Studio section in Streamlabs OBS. Next to the Space Station section, click on the ‘+’ sign to create a new scene.

A small window will pop up, where you need to enter the name of the scene.

After entering the name, click on Done.
Step 2: Now comes the part where you select the music that you want to play for that specific scene.
Click on the ‘+’ sign next to the Sources section.
In the following window, click on Media Source and click on Add Source. Before proceeding to the next step, make sure to take a look at the list of file formats that are supported by OBS.
Step 3: On the next window, click on the checkbox that says Local File. Then, select the music file that you want to play.
You can adjust a few things like playback speed, loops, etc. After that, click on Done.
Step 4: You have successfully added the soundtrack for that specific scene. However, we are not done. You need to adjust the settings of OBS in a way that automatically plays the music when you select a specific scene.
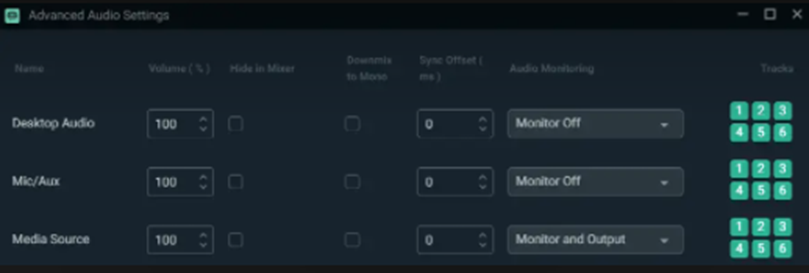
Click on the Settings icon (cogwheel) located just beside Mixer.

Step 5: Under Audio Monitoring, open the drop-down menu for “Media Source” and select Monitor and Output.
Follow the same process for different scenes. OBS will automatically play the corresponding music file for each scene based on the adjustments you made before.
Best Places to Find Royalty-Free Music for Stream
Choosing non-copyrighted music for your stream is extremely necessary if you don’t want to face trouble. Your stream can get muted, or your channel might even get deleted. So, if you want to stay safe while improving the quality of your stream, here are some places from where you can find royalty-free music.
NCS is the most popular source to find royalty-free music on YouTube, and almost all content creators download and use music from this channel. They have almost a thousand royalty-free music that you can use anywhere. And their library is not only vast but diverse as well. They have trap, drum, bass, electropop, and so many other genres.
It is free for everyone, although you should always give credit where it is due and mention the name of the composer of that music.
Epidemic Sound is a music library that has a massive collection of unique music tracks to choose from. This service is not free, but you can try out their software using a one-month free trial. Then you can decide whether to subscribe.
Their library has over 32000 songs for different moods and scenes, and they will surely amp up the quality of your stream.
If you are a fan of video games or want to play video game music in your stream, this is the best place. You can find lo-fi versions of soundtracks of famous and nostalgic games like Pokémon, Minecraft, Legend of Zelda, and many more. These music tracks can add a good gaming vibe to your stream.
If you are looking for lots of lo-fi tracks, then you can check out Chillhop. They have a large variety of lo-fi music, and you can play them in your stream to give a late-night or chill vibe to your stream.
Frequently Asked Questions
Q: How to customize the alert sound
A: If you want to customize the donation alert sound for Twitch or YouTube, go to the Alert Box settings in the Streamlabs dashboard. From there, click on a specific event and choose a music file that will play as the alert.
Q: What is an emote wall
A: Emote wall is a special widget available in Streamlabs OBS that you can use to display animated emotes on your screen. You can set different emotes for different events like a new subscriber or a new donation, etc.
Wrapping Up
These are the different ways in which you can add music to your stream using Streamlabs OBS. As you saw, the processes are almost similar, but there were a few differences based on the requirements. Make sure that you are using royalty-free music from the sources we have given. We hope that this guide was helpful for you.
Read More From Get On Stream:


