
If you’ve ever streamed on Twitch or YouTube, you know that pesky keyboard noise can be a huge distraction. It can be hard to focus on your gameplay when you’re trying to drown out the sound of your own typing. Here, we will show you how to remove keyboard noise in Streamlabs and create a more professional streaming experience for your viewers!
How to Reduce Keyboard Noise when Recording on Streamlabs
Streamlabs is among the few easy-to-use streaming software available in the market. Besides having a workable user interface, Streamlabs also makes it possible to manage sound quality in your streams without much hassle by using filters. Getting filters on Streamlabs is easy because they are inbuilt. All you have to do is add them, and this step-by-step guide will help you do just that.
- Open Streamlabs on your computer.
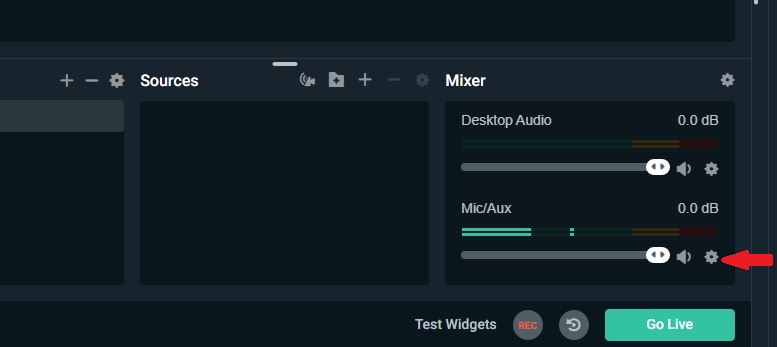
- Go to the Mixer section which is at the bottom right side of your Streamlabs and click on the gear button under the Mic/Aux option.
- On the drop-down menu that appears, click on Filter and then select Edit Filter.
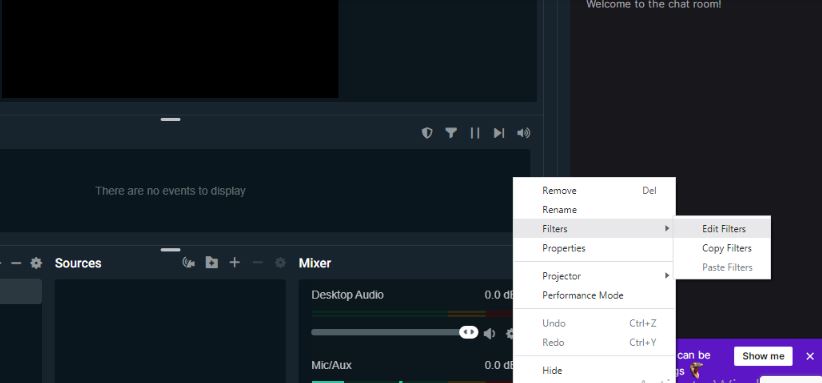
- This will open a Source Filters window with a + Add Filter button on the top left side of the window.
Note: You will repeat this process when adding a Filter for the sections below.
How to Remove Keyboard Noise in Streamlabs Using Filters
Tip!
Before you can start making your filter adjustments it’s great to first change how you monitor your noise.
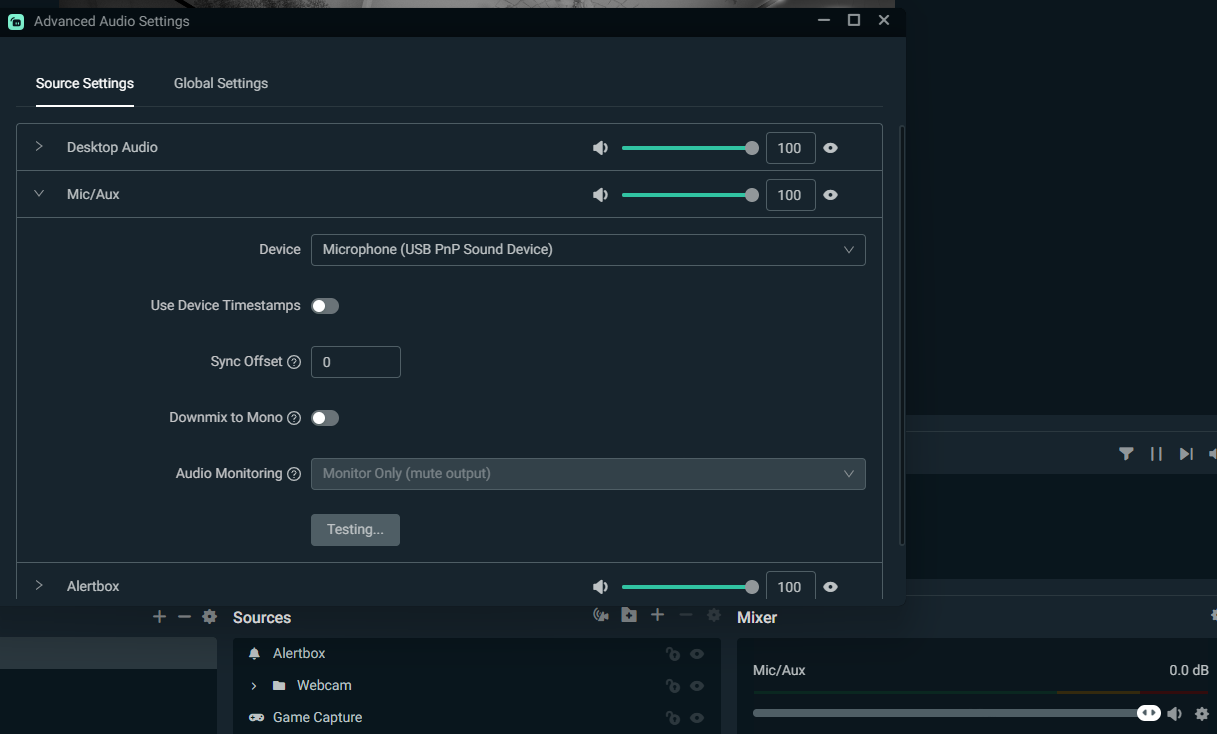
You can do this by clicking the gear button in the Mix/Aux section, and select Properties to open Advanced Audio Settings and change Audio Monitoring to “Monitor Only”. This will enable you to hear what your viewers will be hearing when your stream is live. Doing this gives you better control when you are doing your Filter fine-tuning.
Remember to revert the Audio Monitoring setting back to “Monitor Off” after successfully removing the keyboard noises.
Now let’s look at individual filters and how you can fine-tune them to get the best audio quality.
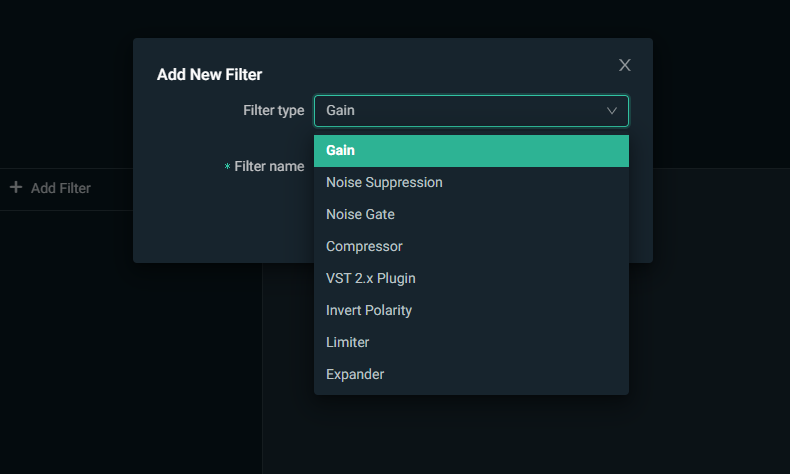
Streamlabs Noise Suppression
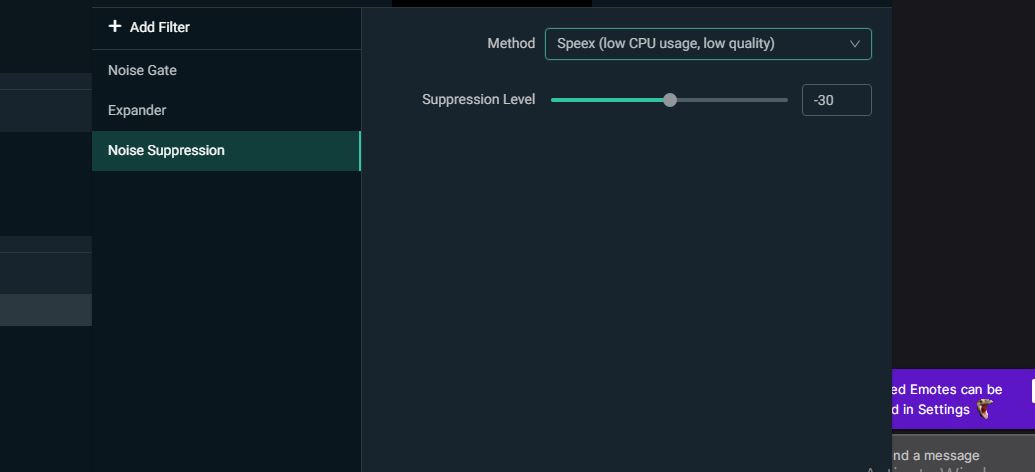
Noise suppression is an excellent filter to start with. To use the noise suppression filter, you will need to choose between its Speex or RNNoise options. These two options are relatively similar, with the significant difference being the CPU usage; Speex has low CPU usage while RNNoise has more CPU usage.
RNNoise tends to give the best immediate high-quality audio when selected. However, if using it doesn’t fix your problem, go for Speex and experiment with the best noise suppression level. The default level is usually -38 so try to move the gain up or down to get results. Move around your suppression levels anywhere between -25 and -40 while monitoring which levels best fits your case.
Streamlabs Noise Gate
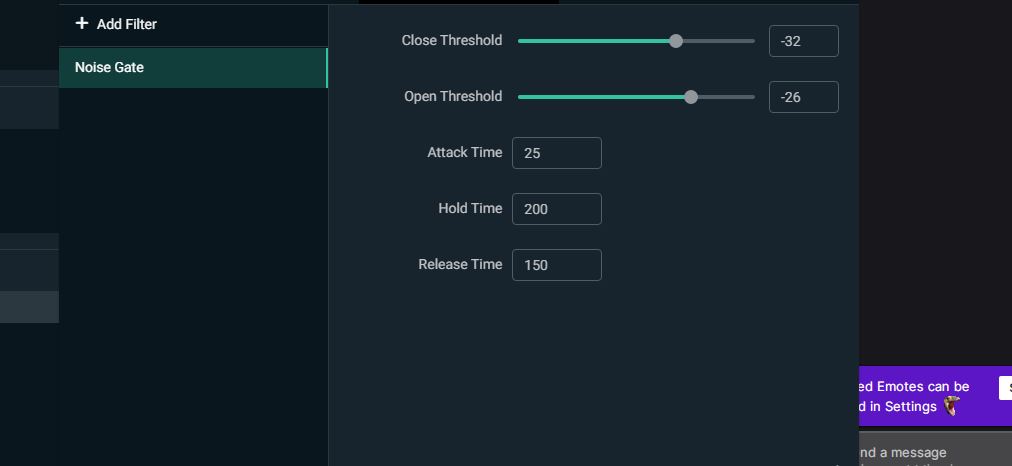
One of Streamlabs most customizable background-noise-removal filters is Noise Gate. This feature comes with custom options to set the sound quality you want. Understanding these options is the fine line between good and poor-quality audio, so here’s a breakdown of the most important ones.
- Open Threshold – the relative loudness of sound is measured in decibels, and the open threshold in Streamlabs ensures you can set your desired decibel threshold (Db). Any sound lower than your selected Db will not be picked up in your recording. A Db of 20 should be good for a start, but your microphone may have different settings, so try recording test audio to see what works best.
- Close Threshold – With a close threshold, any sound higher than your selected Db will close your microphone and hence, will not be picked. As such, strive to set your close threshold Db at around 5Db lower than your open threshold.
Ideally, the default settings should work just fine, but playing around with the levels should help you achieve what works best with your mic.
Streamlabs Expander

An expander creates a difference between loud sounds and soft ones when it comes to audio settings. It makes loud sounds louder and soft sounds softer. To manage this Filter on Streamlabs, you need to understand the two core presets it comes with.
Expander – This allows you to make light nose reductions. It sets your audio at low ratio and low release time. The ratio, in this case, is how much your audio signal can be expanded or reduced. Lower ratios reduce noise slightly, while higher ones can completely reduce your audio signal, meaning no sound is picked up at all. A good balance is a ratio of 4:1.
Gate – This preset has a high ratio and high release time and works like Noise Gate. Release time is measured in milliseconds and refers to the time it will take before your expander reaches complete reduction. A 50–120ms release is often good enough.
Streamlabs Limiter
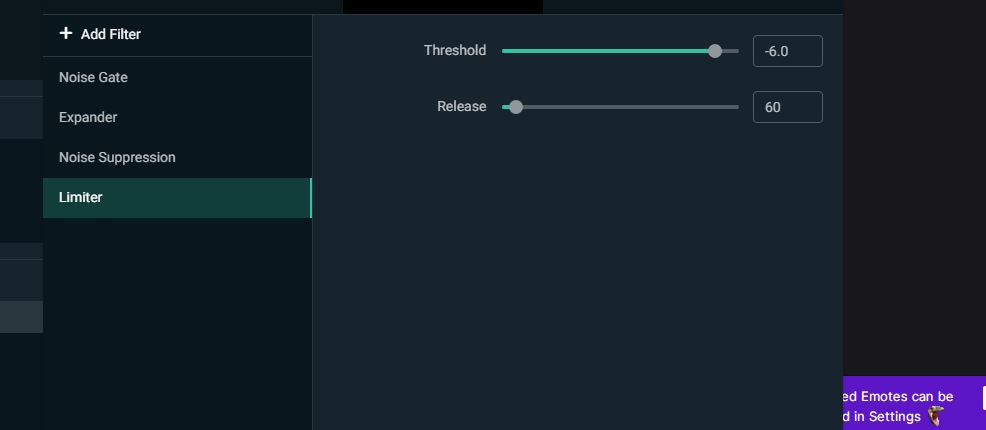
Limiters are great for preventing loud noises from sipping into your audio. The limiter comes with two necessary settings.
Threshold – It works by letting you set a specific Db limit. This allows the limiter to equalize any sound above the threshold back to the set limit. For standard audio, a limiter value of -8 will work well.
Release – You also need to focus on the release when working with a limiter. The release determines how long your sound will be equalized when it goes past the threshold. Setting your release anywhere between 0 and 5 will serve the purpose.
Can I Add Alert Sounds To My Audio on Streamlabs?
Alert sounds make it easy for you to engage your audience, and Streamlabs makes it possible on Streamlabs. Once you access the Streamlabs dashboard, click on Alert Sounds Settings, and then click on the plus icon next to Sound, you will see a list of free and premium sounds that you can use.
What Audio Bitrate Should I Use on Streamlabs?
Audio bitrate on Streamlabs should be set based on the quality you are streaming at. For 720p, 30fps, use a bitrate of 2,500 to 4,000 kbps. For 720p 60fps, set bitrate at 3,500 to 5,000 kbps. 1080p 30fps, works well with a bitrate of 3,500 to 5,000 kbps, while 1080p 60fps, works with 4,500 to 6,000 kbps of bitrate.
Wrapping Up
Audio quality is a make-or-break factor for streamed content. That is why it’s essential to understand which filters on Streamlabs will reduce keyboard clicks and background noises that lower your audio’s quality. Once you try out these filters, remember to let us know which ones worked and what values you set for each.
Read more on Get on Stream


